Teachers / Lesson plans / Do-Nothing Machine
Lesson plan · Grades 3-8Why do the two sliders never crash?
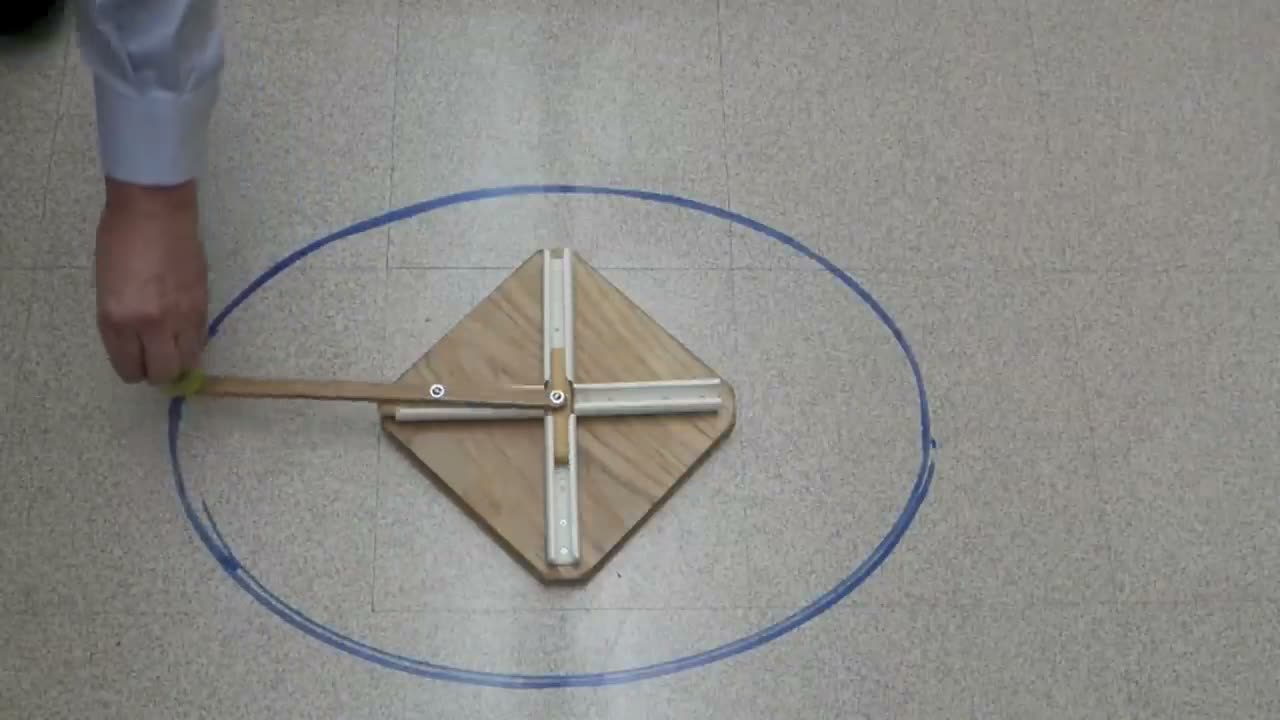
Students build a cardboard trammel of Archimedes, the 'do-nothing machine', and discover that two sliders joined by a rigid handle can never collide. They use it to draw ellipses, measure how pivot spacing changes the shape, and identify how the handle switches between first- and second-class lever as it turns.
Two sliders race through the same crossing over and over, at any speed. Why don't they ever crash?
Learning objectives
- Students will be able to explain, using the fixed distance between the pivots, why the two sliders never collide.
- Students will be able to measure the long and short widths of the ellipse the handle draws and compare them for two pivot spacings.
- Students will be able to identify the fulcrum, load and effort at two positions of the handle and classify each as a first- or second-class lever.
- Students will be able to predict how moving a pivot hole will change the ellipse, and test the prediction.
Lesson flow (5E)
Day 1. Crank the demo machine slowly, then fast. Ask students to predict whether the sliders will ever crash, and to write one question about how it works.
Day 1. Pairs glue the foam squares and cereal-box overhangs onto their bases using the spacer strips, insert the sliders and attach the handle. Glue dries overnight, or use double-sided tape to test the same day.
Day 2. Pairs stop the handle with one slider at the crossing and measure where the other one is. Discuss the trammel idea: each slider is confined to a track, and the rigid handle keeps them a fixed distance apart, so they can only take turns. Introduce trammel, ellipse, fulcrum and lever classes.
Day 2. Pairs trace an ellipse with a marker on the handle, measure the long and short widths, then move a fastener to the third hole, predict the change and draw again. They also stop the handle at both 'turnaround' positions and decide which slider is the fulcrum and which lever class it is. Show the string-and-pins ellipse for comparison.
Day 2. Students complete the worksheet for their age band and answer an exit ticket: explain why the sliders never crash, using the distance between the pivots.
Discussion questions
- What did you predict would happen when you cranked fast, and what actually happened?
- When one slider is at the crossing, where is the other one, and why?
- Why is the drawn shape an oval instead of a circle?
- What happened to the oval when you changed the spacing between the pivots?
- Which slider acts as the fulcrum at each turnaround, and what lever class does that make?
- Bruce calls it a do-nothing machine. Does it really do nothing? What could it be used for?
Common misconceptions
Assessment
- Exit ticket: 'Explain why the sliders never collide. Use the words track and distance.'
- Check the ellipse table on the worksheet: the long width minus the short width should be about twice the pivot spacing.
- Quick performance task: stop the student's handle at a turnaround and ask them to point to the fulcrum, load and effort and name the lever class.
- Older students: the 11-14 worksheet's fair-test table and variables question.
Differentiation
Support: Give younger students pre-assembled bases so they only insert the sliders and attach the handle. Focus on predicting and observing (crash or not, circle or oval), using the 5-7 worksheet.
Extend: Students show that the long and short half-widths equal the distances from the marker to each pivot, find the point on the handle that draws a circle (midway between the pivots), or compare with a string-and-pins ellipse and its two foci.