Build plans / Baby Van de Graaff Generator
Baby Van de Graaff Generator
This small Van de Graaff generator uses a rubber-band belt driven by a toy motor to pile electric charge onto an empty soda can. It runs on three C or D cells, makes a spark about an inch long, and can do most of the classic demonstrations a full-size classroom generator does, including flying pie pans, standing hair and a pith-ball 'hailstorm'.
Written from Bruce's original workshop handout. Bruce's final review of this plan is in progress.
What it shows
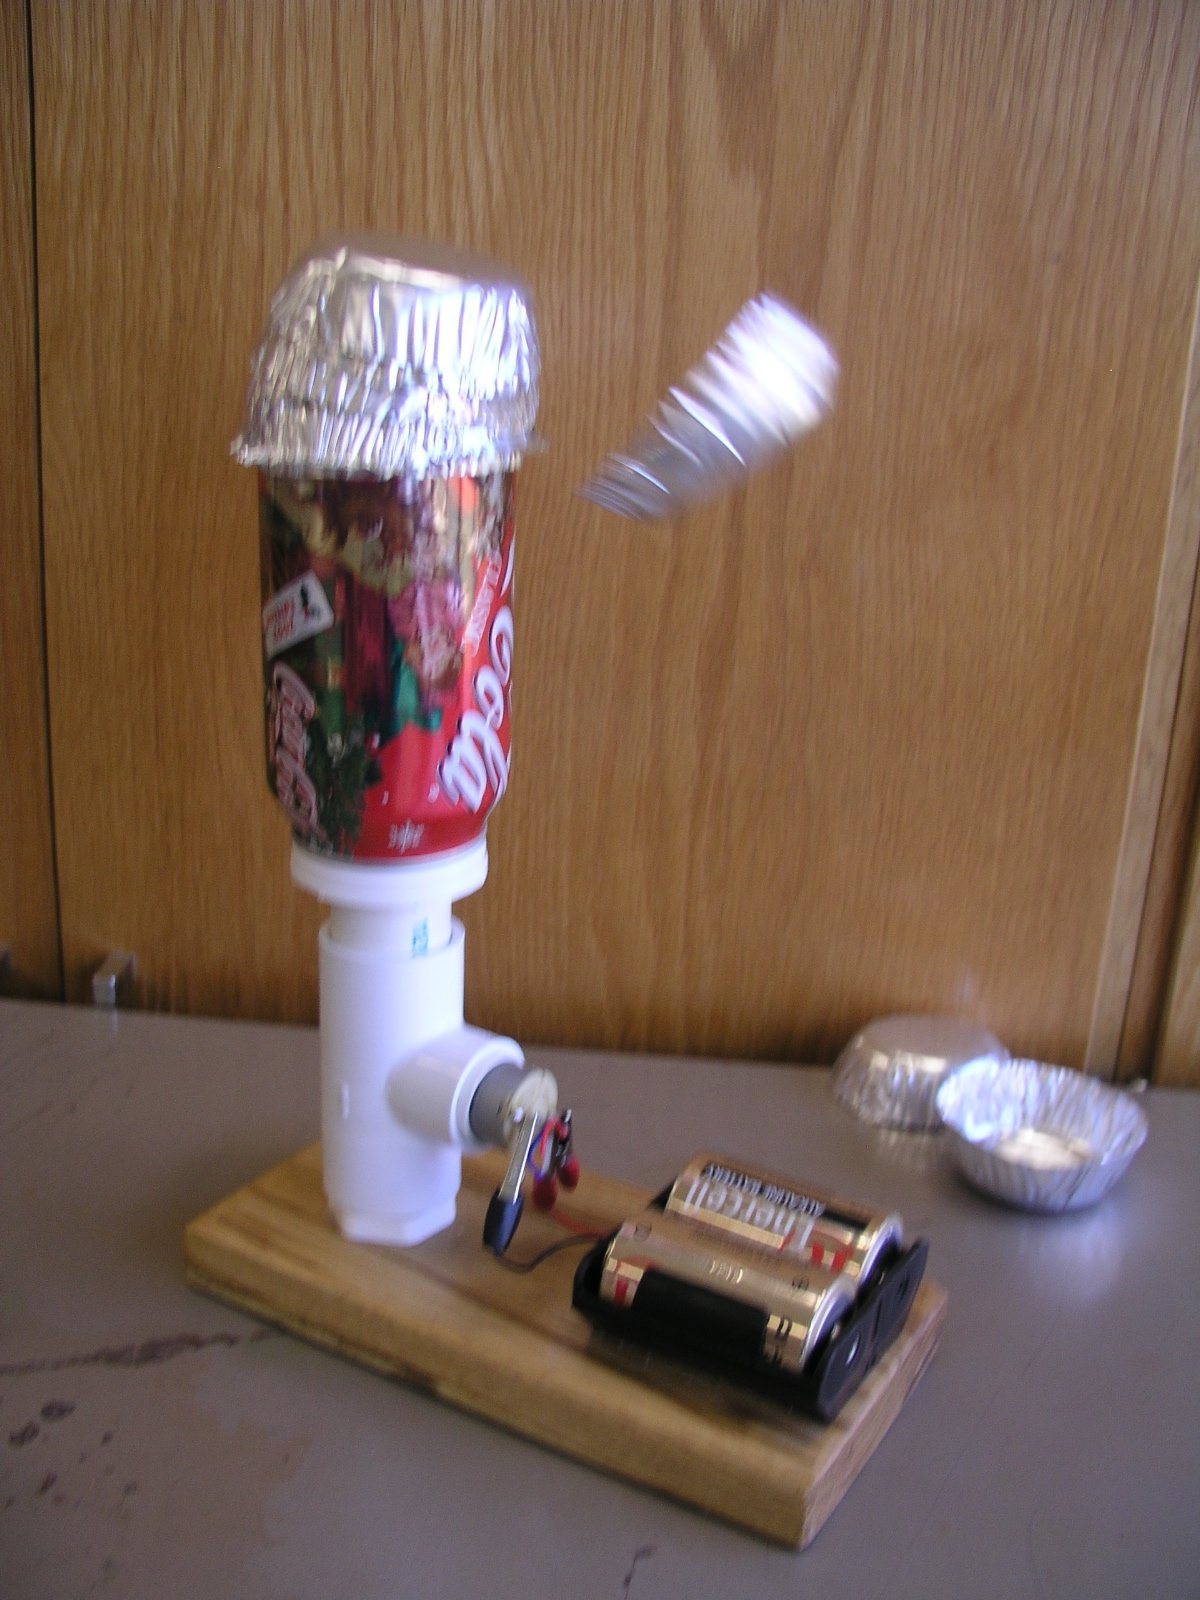
A soda can, a rubber band and a toy motor add up to a static generator that throws a one-inch spark and launches pie pans off its top.
Key ideas: static electricity, charge separation, triboelectric effect, electric field, conductors and insulators, induction
Build it
Mount the stand on the base
Drill a pilot hole in the wood base and screw the 1/8 in bolt up through it from underneath; cut the bolt off so it stands 1 3/4 in tall. Set the PVC adapter over the bolt, drop the fender washer over the bolt inside the adapter, and tighten a nut down on the washer to clamp the adapter firmly to the base.
Wire the battery holder
Screw the battery holder to the base with two small wood screws. Solder an alligator clip to the end of each battery lead so you can connect and disconnect the motor easily.
Make the lower roller
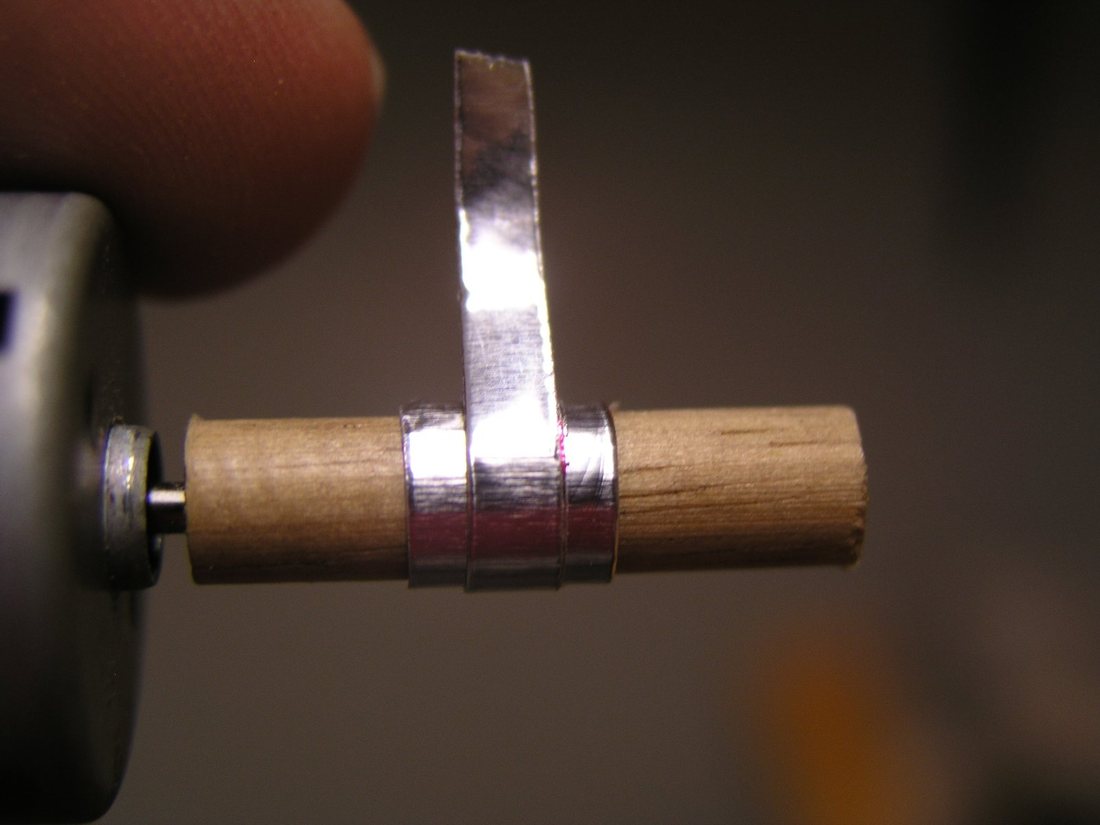
Drill a 1/16 in hole in the end of the 1 in length of 1/4 in dowel and press it onto the motor shaft as far as it will go without rubbing the motor body. Cover the dowel with aluminum tape: first a 1/4 in wide strip around the middle, then a 1/8 in strip on top of it, then a single 1 in wide wrap over everything. The slight bulge in the middle keeps the belt centered while it runs.
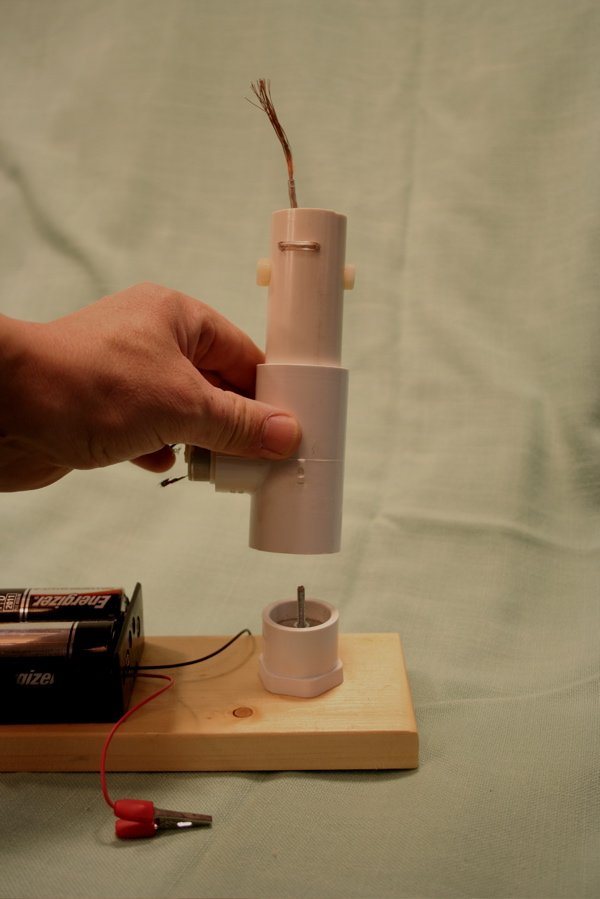
Fit the motor into the tee
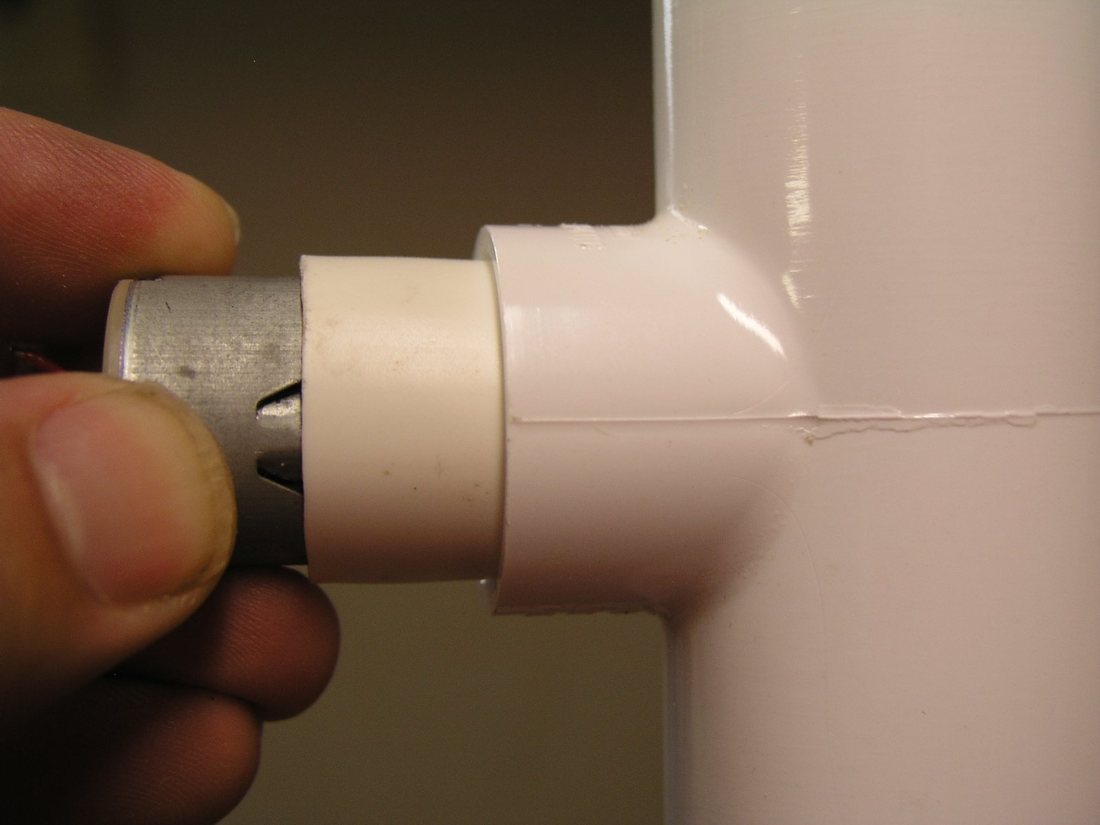
Sand one end of the PVC tee until it slides onto the base adapter with a firm push. The motor goes in the side opening of the tee; if it is loose, slide in the short piece of 3/4 in pipe as a sleeve and sand its inside until the motor fits snugly, or wrap the motor with a few turns of tape. Check that the roller does not touch the far wall of the tee.
Glue the coupling to the can
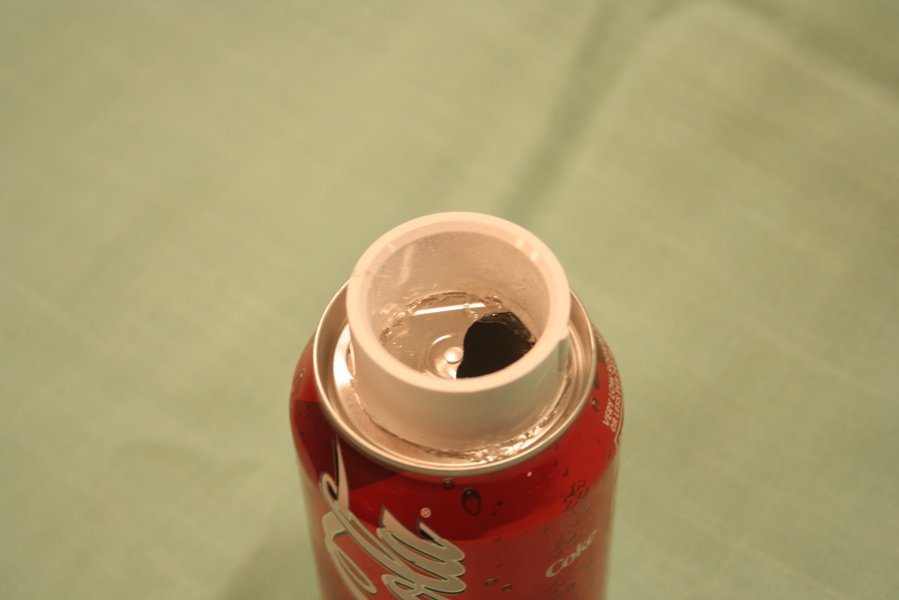
Saw the 1 in PVC coupling in half. Glue the cut edge of one half to the center of the top of the clean, dry soda can so the edge touches the can all the way around, and let it dry completely. This collar lets the can sit on top of the column.
Cut and drill the column
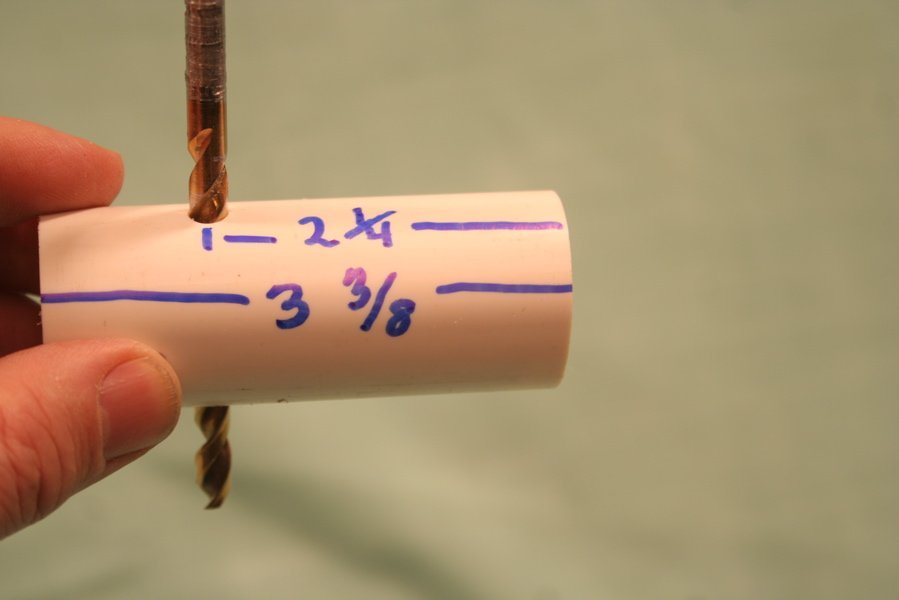
Cut the thin-walled 1 in pipe to 3 3/8 in. Measure 2 1/4 in from one end and drill a 1/4 in hole straight through both walls for the nylon bolt.
Drill the holes for the comb wire
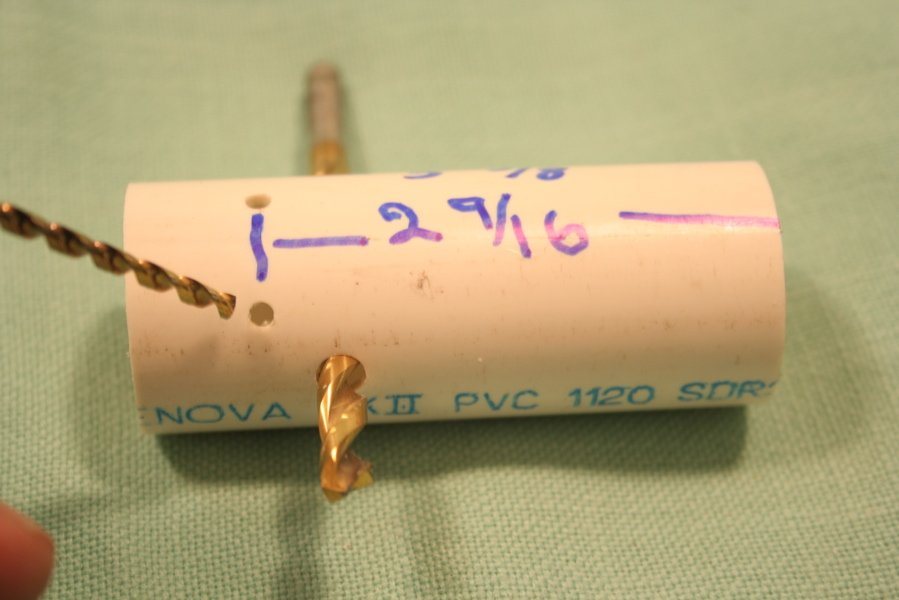
Measure 2 9/16 in from the same end and drill a small hole at right angles to the bolt holes; Bruce used 3/16 in, but size it so your wire fits snugly. Drill a second small hole about 5/16 in from the first.
Install the upper roller and belt
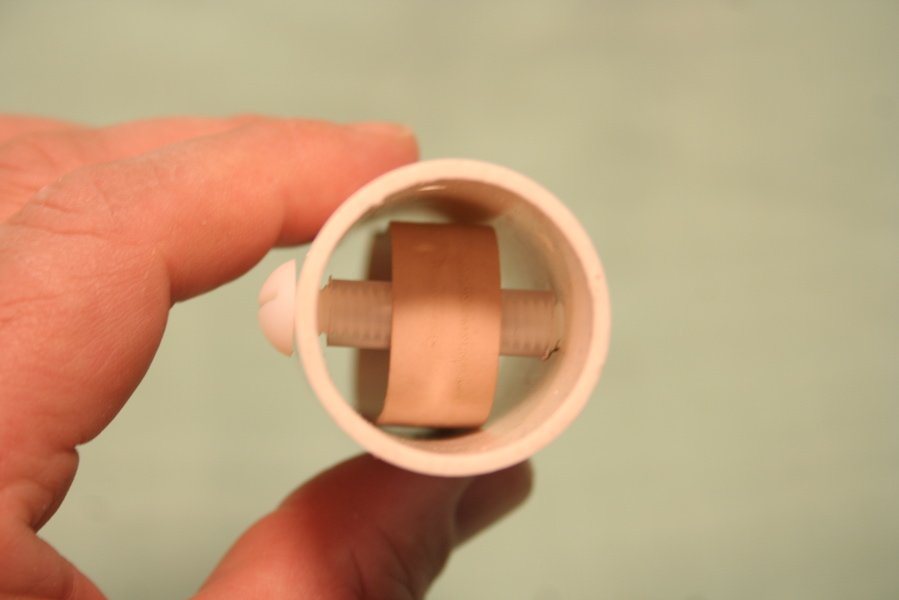
Cut the plastic tubing to about 7/8 in; it should spin freely on the nylon bolt without much play. Hold the tube inside the rubber band, lower both into the pipe and line the tube up with the 1/4 in holes, then push the nylon bolt through the pipe and tube and add the nylon nut.
Make the upper comb
Push the 5 in stranded wire through the first small hole, strip about 1/2 in of insulation from the inside end, and fan the strands out and slightly downward like a tiny leaf rake. Pull the wire back until only about 3/4 in remains inside, with the strands centered over the belt and upper roller.
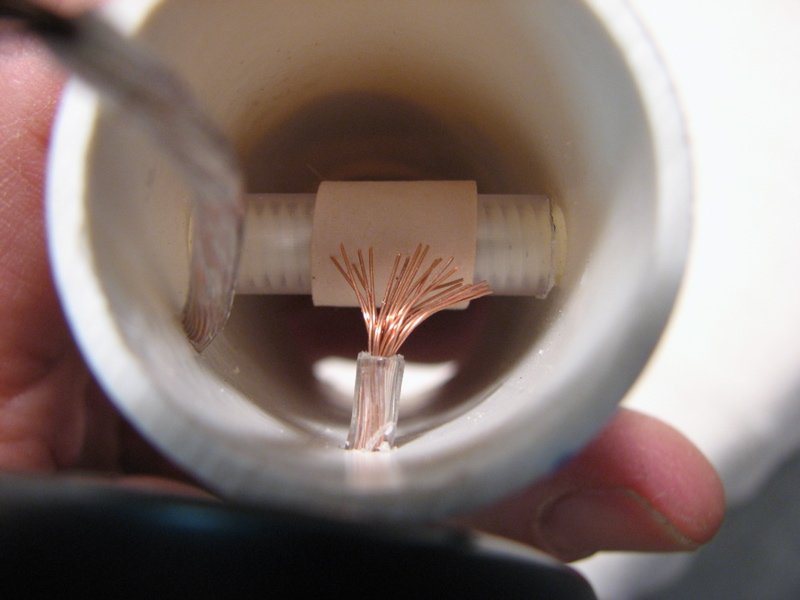
Set the comb gap
Adjust the strands so they sit very close to the rubber band, about 1/32 in (half a millimeter), without touching it. Closer is better, but if they touch the belt the generator will not work.
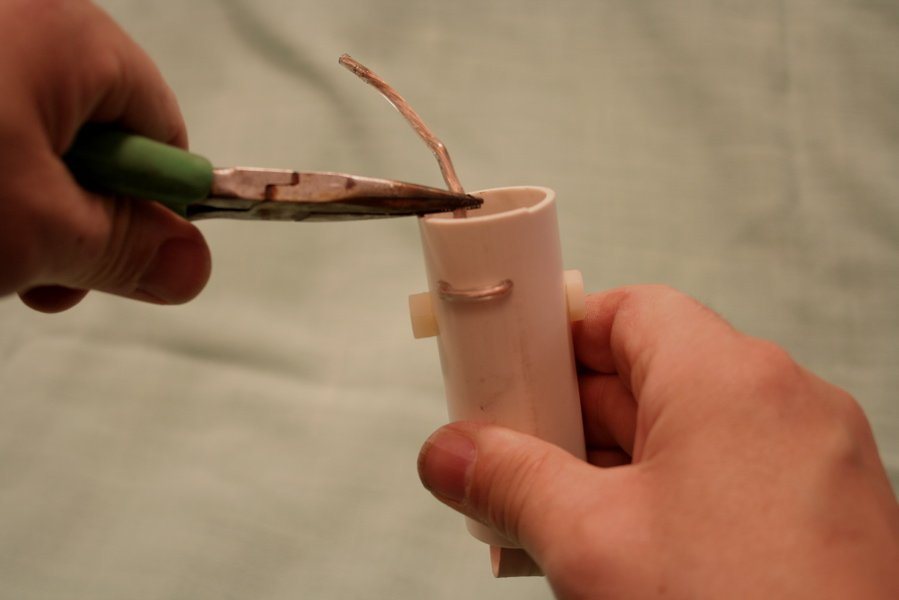
Anchor the comb wire
Feed the outside end of the wire back into the pipe through the second small hole and pull it tight with pliers. Strip about 3 in of insulation from this end; it will contact the inside of the can.
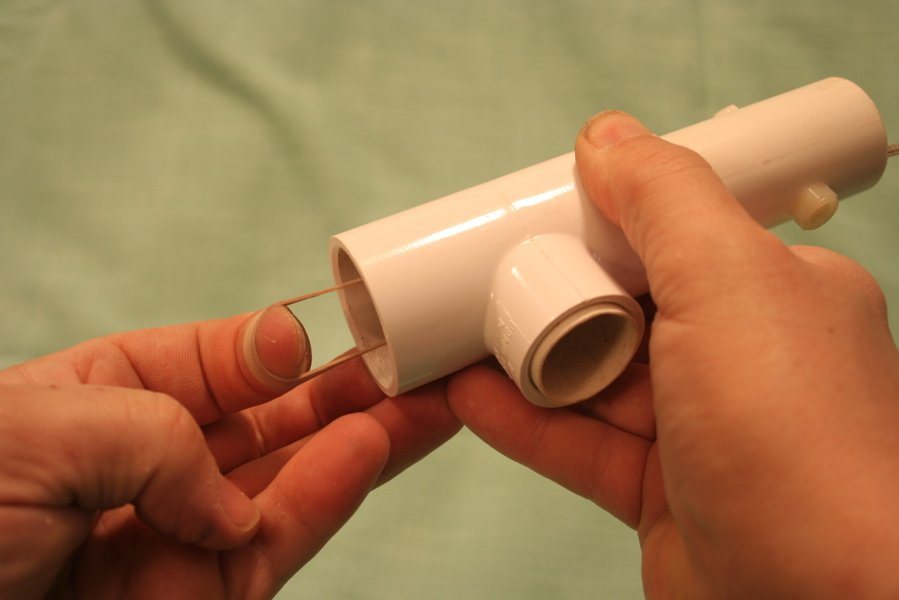
Join the column to the tee
Slide the column into the unsanded end of the tee with the nylon bolt parallel to the motor shaft. Reach in, catch the rubber band, stretch it down through the other end of the tee, and while holding it, slide the motor into place so the belt rests centered on the lower roller.
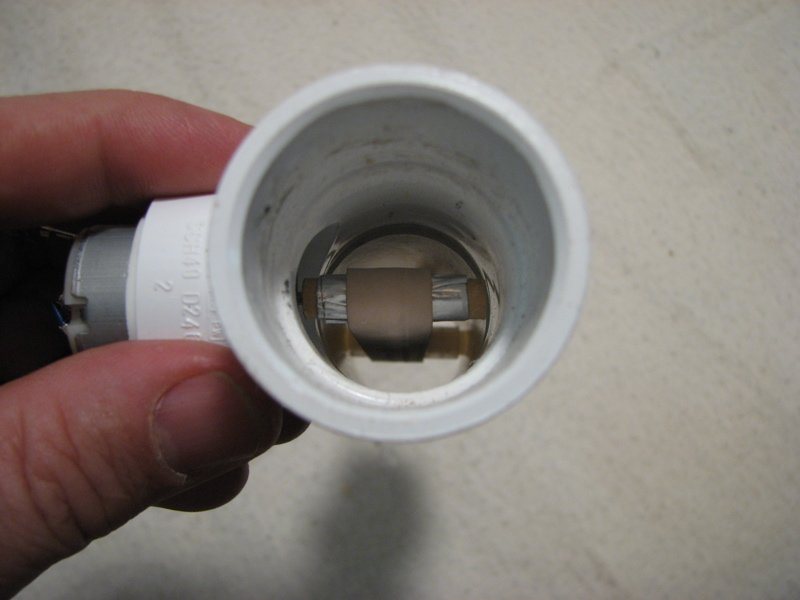
Adjust the belt tension
Connect the battery. If the motor turns slowly or stalls, the belt is too tight: push the column farther into the tee to loosen it. Slide the sanded end of the tee onto the base adapter; if the belt rubs the bolt below, the motor will slow down, so twist and lift the tee slightly until the motor sounds like it is running at full speed.
Add the can and test
Bend the bare end of the comb wire so it will press against the inside of the can, then set the can's collar onto the top of the column. This contact is essential: without it the can collects little or no charge. Run the motor and hold the inside of your wrist about an inch from the can; you should see and feel a small spark.
How it works
The rubber belt and the materials it rubs against (the aluminum-covered lower roller and the plastic upper roller) sit at different places on the triboelectric series, so as the belt runs, contact and separation move electrons from one material to another. One section of the belt leaves each roller carrying extra charge.
At the top, the fine wire strands of the comb sit just above the moving belt. The strong electric field near their sharp tips lets charge jump across the tiny air gap between the belt and the wire. Because the wire touches the inside of the can, that charge flows straight onto the can.
Charge on a hollow conductor moves to its outside surface, so the inside of the can stays nearly charge-free and the comb can keep delivering more. The charge builds until the can's voltage is high enough to leak into the air or jump to your knuckle as a spark. A one-inch spark means tens of thousands of volts, but the total charge is tiny, which is why it only stings.
Standing the generator on a metal sheet helps because it gives the lower end of the system a large conducting surface to exchange charge with.
Using it
- Flying pie pans: cut the cups apart from an aluminum cupcake pan and stack several on the can, with a coin weighting the bottom one so the stack does not slide off. Turn on the generator and the pans fly off one at a time, because each one takes on the same charge as the can and is repelled. Ask: why does the weighted pan stay?
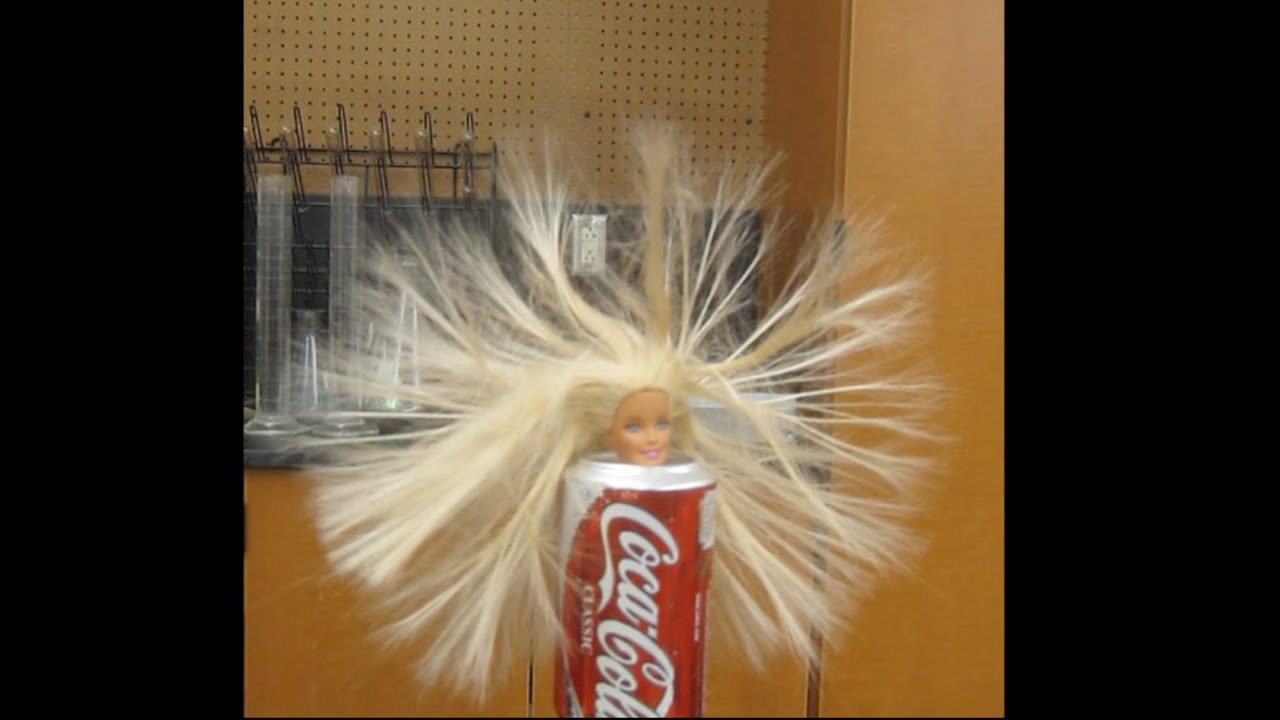
- Bad hair day: push a short 1/2 in bolt into the neck of a doll head with long, thin, straight hair (the bolt adds weight so it stays upright) and set it on the can. The hairs all pick up the same charge and push away from each other. Comb out tangles now and then.
- Fluorescent flash: hold a small fluorescent tube, like the 6 V tube from a camping lantern, near the can. It flickers with no wires attached, because the strong electric field excites the gas inside.
- Volta's hailstorm (see Variations): hold it above the can and watch pith balls bounce wildly between two plates.
- Bell ringer: mount an empty can on a dowel on a small base so its top is level with the generator's can, and hang a small bell on a thread between the two cans. Touch the bell to start it; it carries charge back and forth and dings between them.
- Ask students to predict what happens when you hold a grounded can or your hand near the generator, then test it.
Variations
- Volta's hailstorm: cut a 2-liter bottle to a ring about 3 1/2 in tall. Cover two old CDs with aluminum tape on one side, leaving the center hole of the bottom CD open; the foil sides face the inside. Put 4-8 pith balls (or bits of foam packing) inside, cap the ring with the CDs, and hold it all together with a rubber band running from the tab of an empty soda can sitting on the top CD (the tab pokes through a slit in that CD) down to a bent paper clip anchored across the bottom CD's hole. Tape over the paper clip to keep it centered. Hold it above the generator by the can so the top plate is grounded through your hand; the balls shuttle between the plates. It also works with a full-size generator.
- Static motor: a carbon-coated foam ball with a straw through its middle spins on a bolt fixed to a plastic panel on a wooden base. Two or more smaller coated balls on coffee-stirrer arms (about 3 in long) stick out from it. Set it so the balls pass very close to the generator's can on one side and a second can on the other without touching either; the balls pick up charge from the generator, are repelled, and dump it on the other can, so the rotor keeps turning. Balance the arms carefully, trimming the heavier side if needed.
- Bruce's older version used two D cells; three cells give a stronger belt speed and a better spark.
Troubleshooting
More build plans
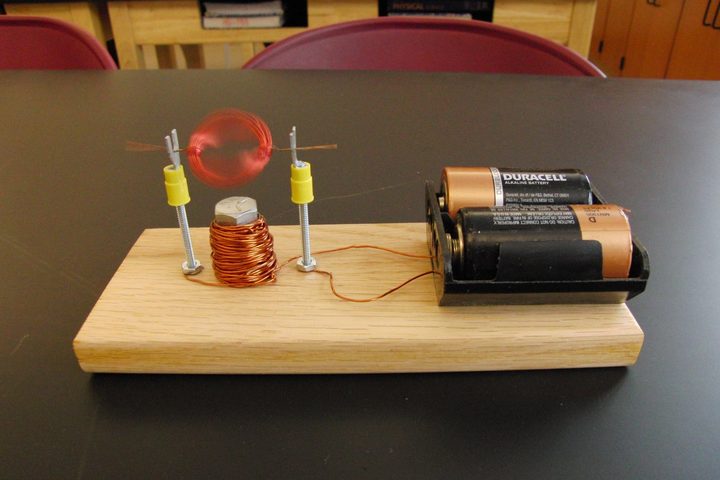
No-Magnet Motor (Double-Coil Motor)
Students who have built the classic coil-and-magnet motor are always surprised that it still spins when the magnet is swapped for a coil of wire around a bolt.
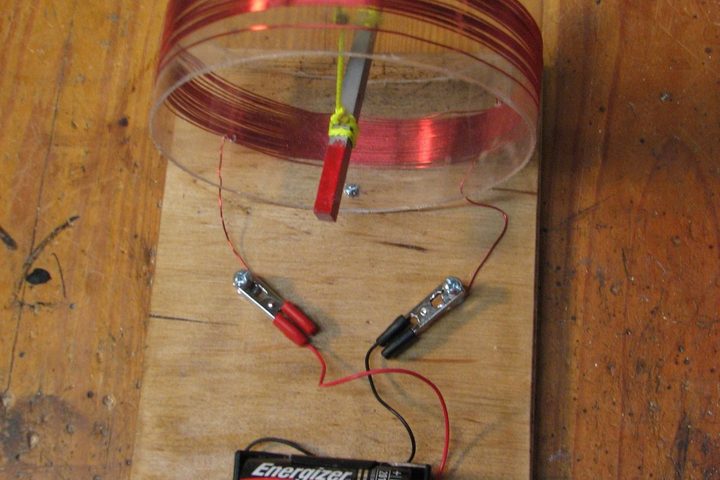
Tangent Galvanometer
Clip on one wire and a hanging bar magnet swings to face across a ring of copper wire; reverse the battery and it spins all the way around.
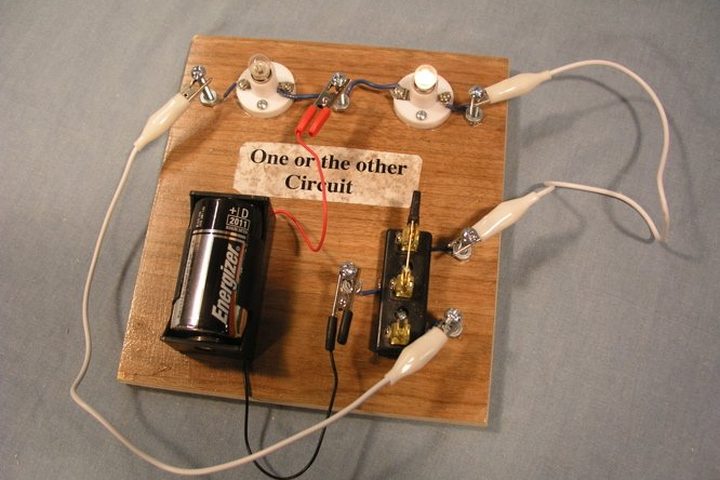
Circuit Demonstration Boards
Seven small wooden boards turn abstract circuit diagrams into bulbs that students can light, dim and puzzle over with their own hands.
© Bruce Yeany · Homemade Science with Bruce Yeany · youtube.com/@YeanyScience
Free for personal and classroom use. Please don't resell or republish. Build and use at your own risk; follow the safety notes and supervise children.